Table of Contents
When you purchase a new motherboard, it will come with several connectors located on the front panel. But to connect them properly, you need to know how to connect front panel connectors to the motherboard?
If you are a beginner and have no idea how to do it, don’t worry. You are not alone here because many people are unaware of this task as they are not professionals. It is not that difficult as well as you can do it in only a few minutes to figure out what you have to do.
This guide will walk you through step-by-step so you know how to connect front panel connectors to the motherboard.
What Are Front Panel Connections?
Before knowing about front panel connections to the motherboard, try to learn what front panel connectors are. The front panel on your computer case is there for easy access to essential functions. These connectors allow you to attach a power button, hard drive, and speakers. To connect these devices to the motherboard, you will need to use several cables included with the motherboard.
You can easily access the audio and USB ports and systems like power-on and power-off buttons. Let’s get to know some of the features of b550 front panel connectors and what they commonly support.
Most of the computer cases have the following front panel features:
Power Switch:
It contains a switch through which you can turn on or off your computer. Being a computer user, you must have seen a square-shaped or circle-shaped button on the front side of your computer panel with a light blinking there. That button is actually a power button.
Reset Button:
It is used when your PC gets to freeze and you need to restart it. Sometimes, you have seen that the computer screen gets frozen and you are unable to do anything. In this regard, you can tap or hold on this button to reset your computer and get it back on the right track.
Power light:
It contains a light which you see when the PC is turned on. Mostly, this light is blue in color and turns on when you start the computer, and remains stable when you are using it. When the system sleeps or shuts down, the light will be turned off.
Headphone jack:
It is used when you want to plug in your headphones. Using this port, you can easily connect your headphones, hands-free, and other devices like microphones when you are looking to have a meeting, listen to music, or any other wearable audio device.
Mic Jack:
At this place, you can plug in your microphones. Some computers have separate ports or jacks for microphones and headphones while others have a single jack that you can use for both tasks.
USB ports:
You can easily plug in your USB to transfer data. Normally, a computer panel has multiple USB ports using which you can connect different devices including USB, external devices like speakers, and others.
You may see fancier features in front panels in some cases, but you need to ensure that your motherboard supports those features. For this, you must know that the front panel features plugged directly into the motherboard, which this front panel connectors guide will explain.
Look into it, motherboards for AMD FX 8350, to find the best of the best motherboards.
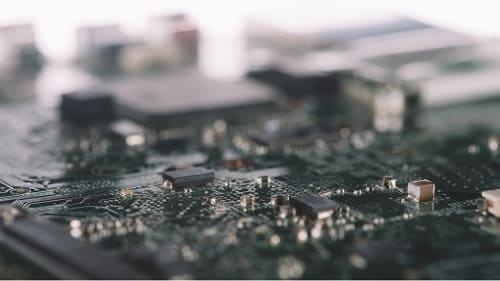
Connecting Front Panel Connectors to Motherboard
Before knowing how to connect front panel connectors to the motherboard? There is a need to be sure that you know how loose the cable should be. It would help to adjust the case once you make a connection.
Once you are confident that you are in the game and the cables are loose enough, you can start working. You must be sure of where the front panel cables connect to.
For this purpose, you can take some guidance from the front panel connectors diagram in the user manual, which comes with the case. Once you are sure, it is time to plug them all in.
It would be best if you knew how to connect motherboard cables. You need to do this carefully and keep that in mind, don’t force anything too hard because they must plug in naturally without making much effort.
The only exception here is with the USB 3.0 connector; it would need some extra push to install correctly because of its size. But you need to make sure that your alignment is perfect before inserting additional force on it.
Otherwise, you could damage several things you don’t even know about. Moreover, you should also know that some panel connectors such as power switch, Hard Drive LED, and Power LED have the same connections.
But in some cases, they have both positive and negative connections; you need to be active to link up the corresponding positive and negative ports on the motherboard.
All of these wires likely need to be connected onto the same port, six if you consider positive and negative wires, side by side, without any spacing. You need to be very careful while connecting the wires.
The incorrect installation can damage the motherboard, and it can cause several other damages without your knowledge. So, don’t be impatient while connecting the front panel connectors to the motherboard.
FAQs
How Do Front USB Ports Work?
The front USB ports will allow you to connect USB devices with your motherboard or have a smooth connection for other small devices.
What Do Front Panel USB 2.0 Connectors Do?
The front panel USB 2.0 connector will enable you to connect this particular device of the specific version 2.0. You can’t connect a USB device of 3.0 or a later version through this connecting port.
What Are the Front Panel Connectors on the Motherboard?
The front panel connectors on the motherboard will enable the users to connect USB devices, speakers, headphones, and many other external devices.
Final Words
In the above blog, we have comprehensively discussed the topic of how to connect front panel connectors to the motherboard? By reading this blog with care, you can easily understand the process and connect different devices with your computer’s motherboard. It will also enable you to understand the working of this particular component of your system to perform various actions.
My name is Hassan, an SEO Expert having field experience of more than 10 years. During my career, I have helped multiple businesses in getting a strong position in SERP results with my optimization techniques as well as have built my websites too. With my SEO expertise, we have grown this website to make it visible for people in search engines.
Let me help you grow your business too by connecting via LinkedIn.